This is complete documentation for CBX Contact Form7 to Trello Posting
Install Plugin
Install the plugin like any other 3rd party wordpress plugin or in short, download the zip from our site.
- Navigate to the ‘Add New’ in the plugins dashboard
- Navigate to the ‘Upload’ area
- Select
cbxcf7fortrelloposting.zipfrom your computer. - Click ‘Install Now’
- Activate the plugin on the Plugin dashboard
Usages
The plugin setup has two steps. After the plugin is activated go to Contact Form Menu which is called “Contact”.
First Step: Integration
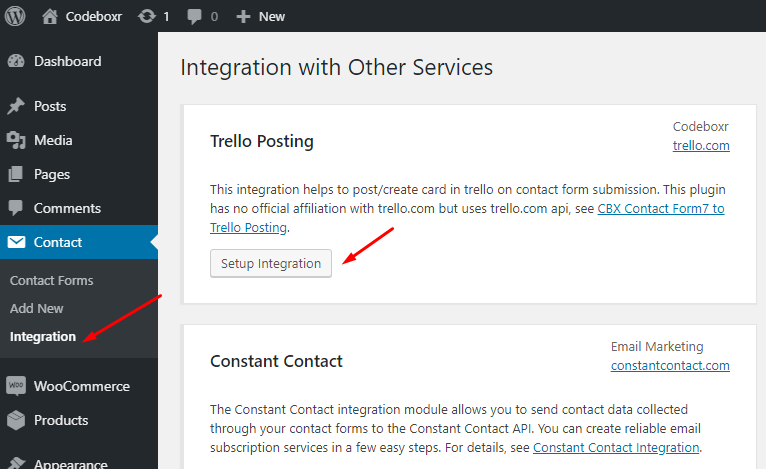
- See there is a submenu under “Contact” named “Integration”, click on it..
- In integration menu there can be other integration options but for this plugin there will be a new one called “Trello Posting”.
- In the “Trello Posting” box see there is a button called “Setup Integration”, click on this.
- On setup form we have two fields “Api Key” and “Api Token”. Now we have to find the Api Key and Api Token. This may seems bit technical but it’s really easy.
- Please visit Trello api site and you will find a api key. Please note that, if you didn’t visit this page and never checked the api key then it will ask you to agree terms and click to view api key. In this step we will find the Api Key but still need Api Token
- In the App page, there is option to generate api token. See there is a text “you can manually generate a Token”. click to generate Api Token. If you can not understand then please see this screen shot.
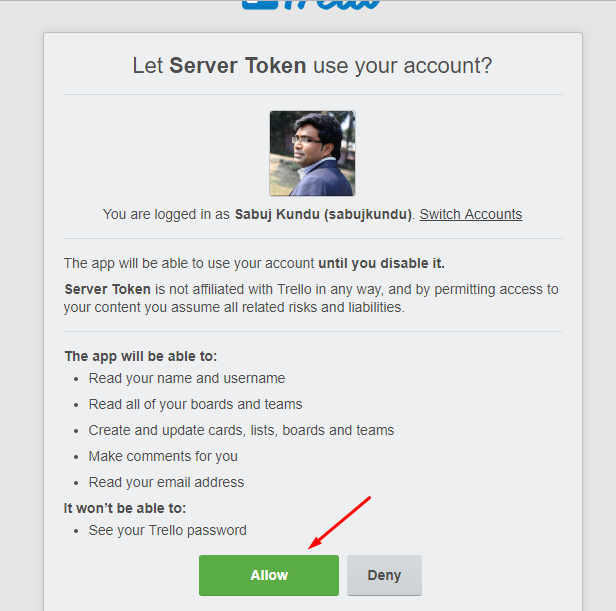
- On click for Api Token generate, it will take to a screenshot for permission, please click allow. Then it will take to page showing the api token, please copy the token code and save in somewhere for future use.
- Now we have Api Key and Api Token. So, in the “Trello Posting” setup form put the both keys in the relevant fields and click “Save Changes”, after save it will show the form as filled. Now we are done for this step.
- Step two is for every single form. Please create or go edit for any form. See there is a new tab called “Trello Posting”. We need to setup this tab. Before setup this tab please setup the form and fields, email template etc as you need and test once that without trello posting plugin enabled your form is working fine.
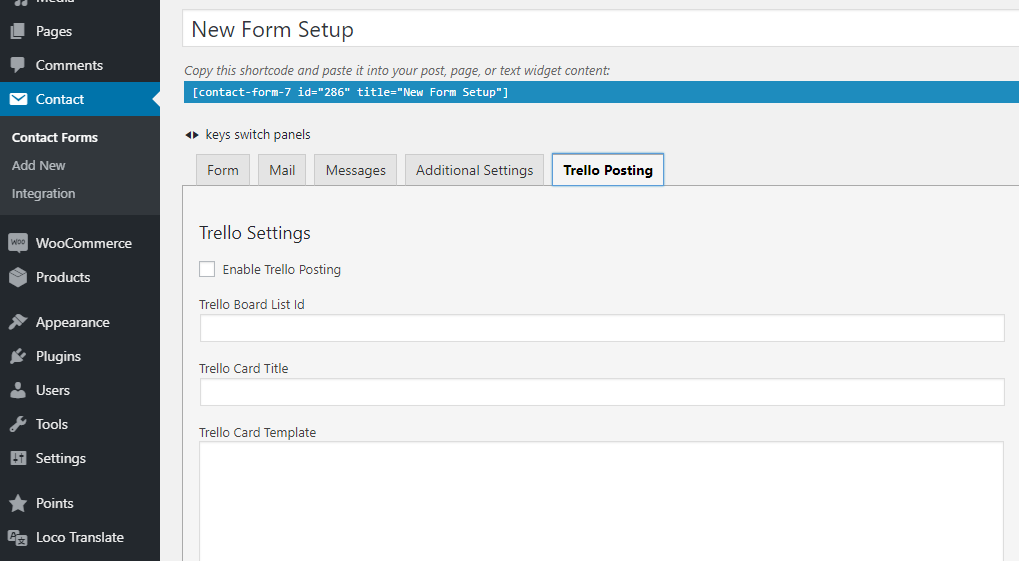
- Now we need to setup the Trello Posting tab. Below we will put information in every field and try to understand what they mean
- Checkbox: “Enable Trello Posting” – In every form we can enable/disable trello posting.
- Text Field : “Trello Board List Id” – We need to go to any trello board and create a list or use any existing list for this. But what we can not see is trello board, list, card everything has a technical id which is invisible but we can manage to find.
- We need to find any trello
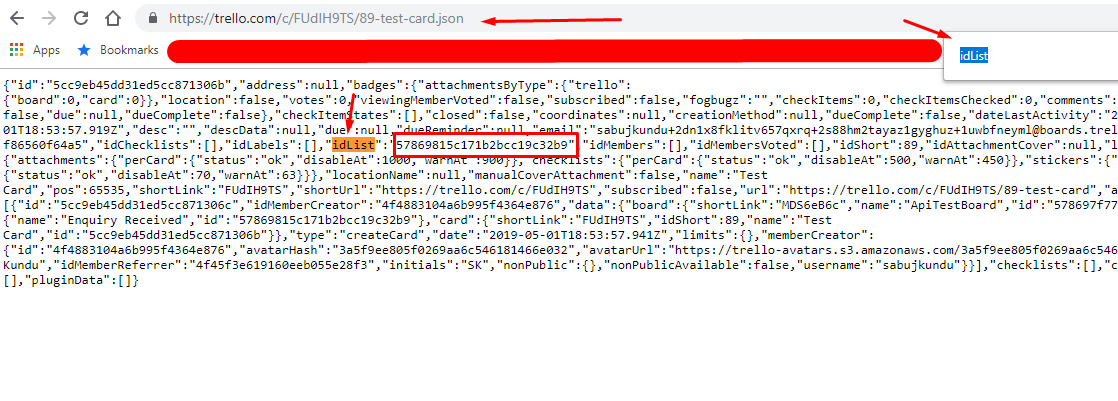
list id. Finding a list id is more fun. In the list create a card, then click on the card, now look in your browser url area the card url is showing. At the end of the card url put.json - Suppose if your card url is
https://trello.com/c/FUdIH9TS/89-test-cardthen make ithttps://trello.com/c/FUdIH9TS/89-test-card.jsonand hit enter, you will see something json data or source code. Search in the page by keywordidListand the browser will highlight the keyword and see something likeidList”:”57869815c171b2bcc19c32b9where57869815c171b2bcc19c32b9is the list id.. see screenshot - Text Field : “Trello Card Title” – Whatever you put tag in email template or subject is possible here with custom text. If your form subject field email tag is
[your-subject]you can put this tag in Trello Card title - Text Area Field: “Trello Card Template” – This is field is like email template field, you can put any tag that is possible in email. Any kind of html tag is also acceptable.
- Checkbox: “Enable File Attachment” – If your form has file attach field and if you want those attach will go to trello card attachment enable this.


Second Step: Trello Posting setup
When you are reading this line you already setup the WooCommerce order to trello posting, Congratulations ! If you have any confusion with the whole process please watch the video tutorial below.