Create Tour
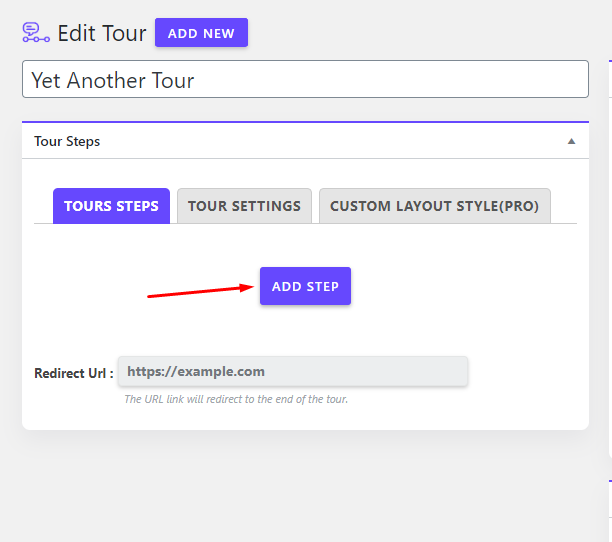
Creating tour is like creating an article or page. From the WordPres dashboard menu “CBX Tour” -> click “Add New”
While creating a tour we need to go via three steps or fill three tabs in the edit screen. At first give a name of your tour for easy remember and then go to first tab
called “Tour Step”. This tab’s initial steps content will be empty, so click “Add Step”

Tour Step
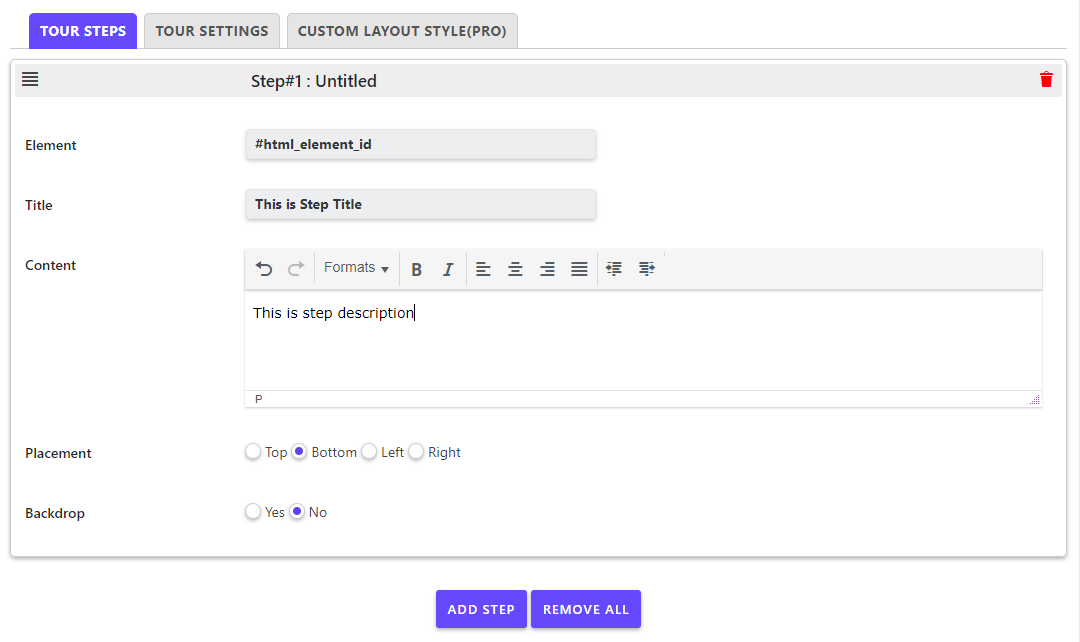
Now you will find a single step edit screen with fields ‘Element, Title, Content, Placement, Position and Backdrop’.
Element: This is any html element id with #
Title: Step Title
Content: Step mini description, please don’t write more than 3/4 lines or keep it short for better user experience
Placement: Radio selection for Top, Bottom, Left and Right
Backdrop: If enabled then this step will be activated in frontend the step pop screen will be visible and rest screen will have backdrop shadow.
Add more steps or save the screen so that the edits are not lost

Redirect Url: Put any valid url if you want to redirect user to any page after end of any all steps
Tour Settings

In tour setting tab there are few fields to control the tour
Display tour button: Show the tour button in frontend or make the tour button visibleShow the tour button in frontend or make the tour button visible
Auto-start: Default tour starts on click on the tour button, but if enabled auto start then in frontend where the tour shortcode is placed when page loads tour automatically starts and guides user
Block Button(Full Width): Show tour button full width or not, default normal or not full width
Button Align: Button alignment ‘Center, left, right or none’
Tour Button text: Tour button text
Layout: Tour layout chooser, we have provided 4 good looking tour layout styles readymade and pro addon has more 10 layouts and custom style builder.
This tab is visible if pro addon is installed and activated.
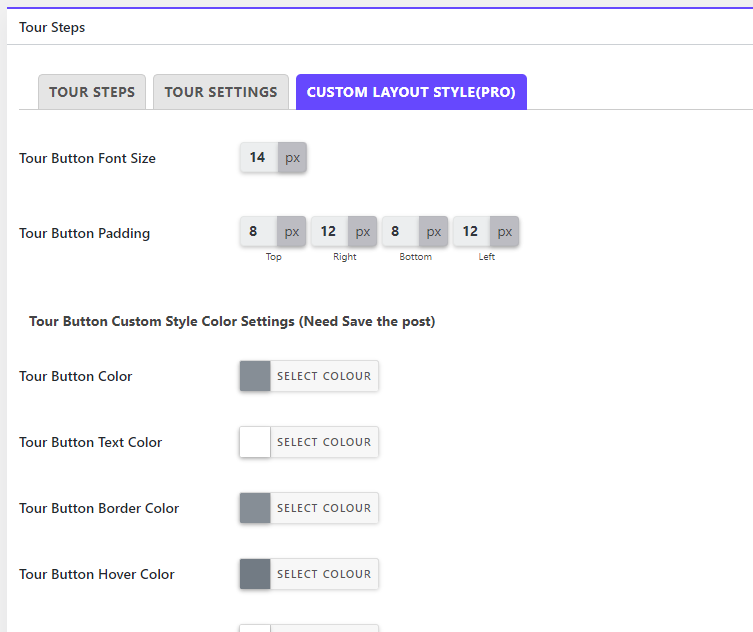
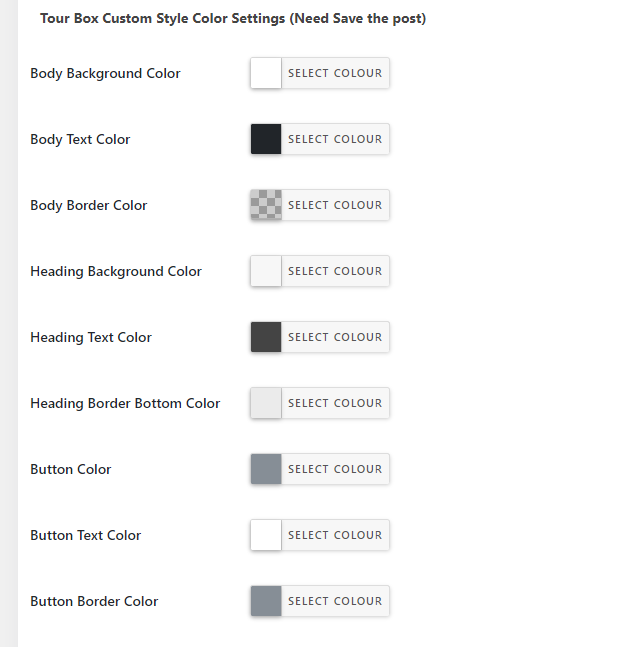
Custom Layout Style
Custom layout style tab helps to style the tour button and tour popup.

