
What is User Walkthrough And Why It’s Important?
All software/app/product involves some sort of learning curve or friction that users must overcome before they could experience its value. As a product owner, your purpose must be to get users over that learning curve to help them get more out of your merchandise as rapidly and efficiently as possible. User Walkthrough does a lot of good for new clients. Helping a new customer/user step by step to understand any application is very fruitful and helps the customer more engaged with the application.
What is User Walkthrough?
User Walkthrough or “Take a Tour” is kind of visual onboarding of customer by step by step information display and pointing specific feature. A small rectangular pop-up ad that presents a short description of a particular component on a webpage (image, button, a type field, text). A help message that interacts with user actions, providing on-page contextual assistance when utilizing a software, internet site, or application. It allows automating customer service and onboarding, giving autonomy to the consumer when using a brand new platform to the very first time, or with doubts. In many websites or application we see some kind of button called “Take a Tour” on click of it, it starts to display in the same window or inside windwos using popup message.
Qualities of a great User Walkthrough
Every item has features that are different, every user has different needs, and useful User Walkthrough will look different for every application. That said, here are four best practices for designing a User Walkthrough that may help move users by your flywheel and onto the next phase in their journey.
Must-have qualities of user Walkthrough
Be sequential
Don’t merely show users an arbitrary collection of tooltips without any structure. Every step on your Walkthrough ought to be clearly defined, and every step ought to move users further down the path to activation.
Focus on a core value
Explaining every little feature will only lead to frustrated and annoyed customers. Ensure you’re only emphasizing the elements necessary for customers to experience your product’s core value to keep them moving towards their aha moment. Additional features can be introduced afterwards.
Keep things short and sweet
New users are keen to get started utilizing your application. Respect their time by making sure your tour is not overlong. Steps only add friction to the onboarding process and should be removed. Less is more–3 to 5 measures is usually a lot for an onboarding flow.
Provide clear next steps
The best Walkthrough clarifies the next step a person should take. How do they begin adding their data? Do they have to register for a paid subscription? Don’t leave them to make it possible for them to take the next step by answering the all-important question: “Where should I start?”
Types of interactive user guides
The types of user walkthrough are product tours, tooltips and modal windows. All are used directly on top of a website or application so that users don’t have to search for instructions and learn while utilizing a stage at the same time. These messages may be personalized to the user and recognize specific actions, just like a click or
mouseover. Below, we’ll go through the three most popular UI patterns for building user guides, and explain how to use each one.
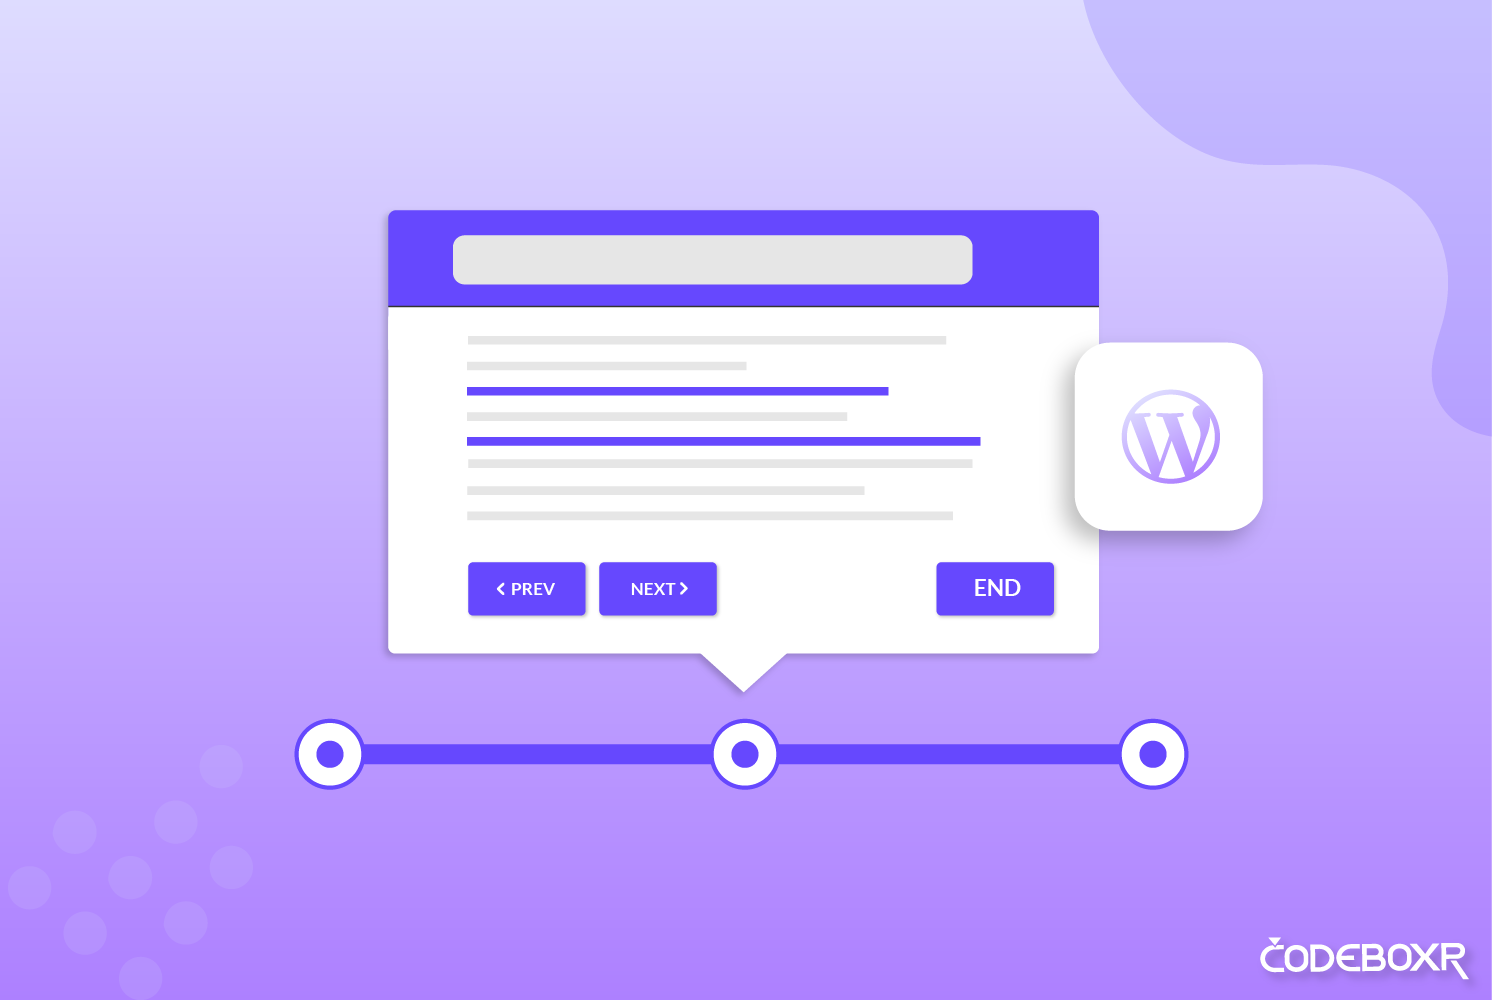
Product tours/Walkthroughs type:
Product tours or Walkthroughs work pretty much just like a GPS navigation, but for websites. Interactive step-by-step messages that direct users through a particular workflow, highlighting the areas they need to go to attain a goal.
Tooltips Type:
Tooltips are contextual help messages that are put across an online site or application to describe different areas. You often see the tooltips in the type fields. These little overlay boxes which point out specific features or element within a SaaS product are the cornerstone of many product tours. Tooltips are likely the most typical
product tour UI pattern you’ll encounter. And for a valid reason! Tooltips offer an extremely contextual way to guide users through your app, without being too prescriptive.
Modal Window Type:
Modal windows are another popular choice for product tours. Modal windows come in all sizes and shapes and may configure to pop up over your UI or to take over the entire screen. Their larger size lets you add more details than you can in tooltips, which makes them ideal for elements like graphics or video.
Retain users on your website
User doesn’t like what they cannot understand. With lots of competitors there, it becomes critical to provide an extraordinary customer experience. And all of it begins with your website. User walkthrough/product tour can help you to keep your customer o your website. If you wish to convince first-time customers, construct personalized welcome messages that show the value of your providers. You may want to remove any frustration and also make clear that what
you are offering is better before users switch to a competitor’s page.
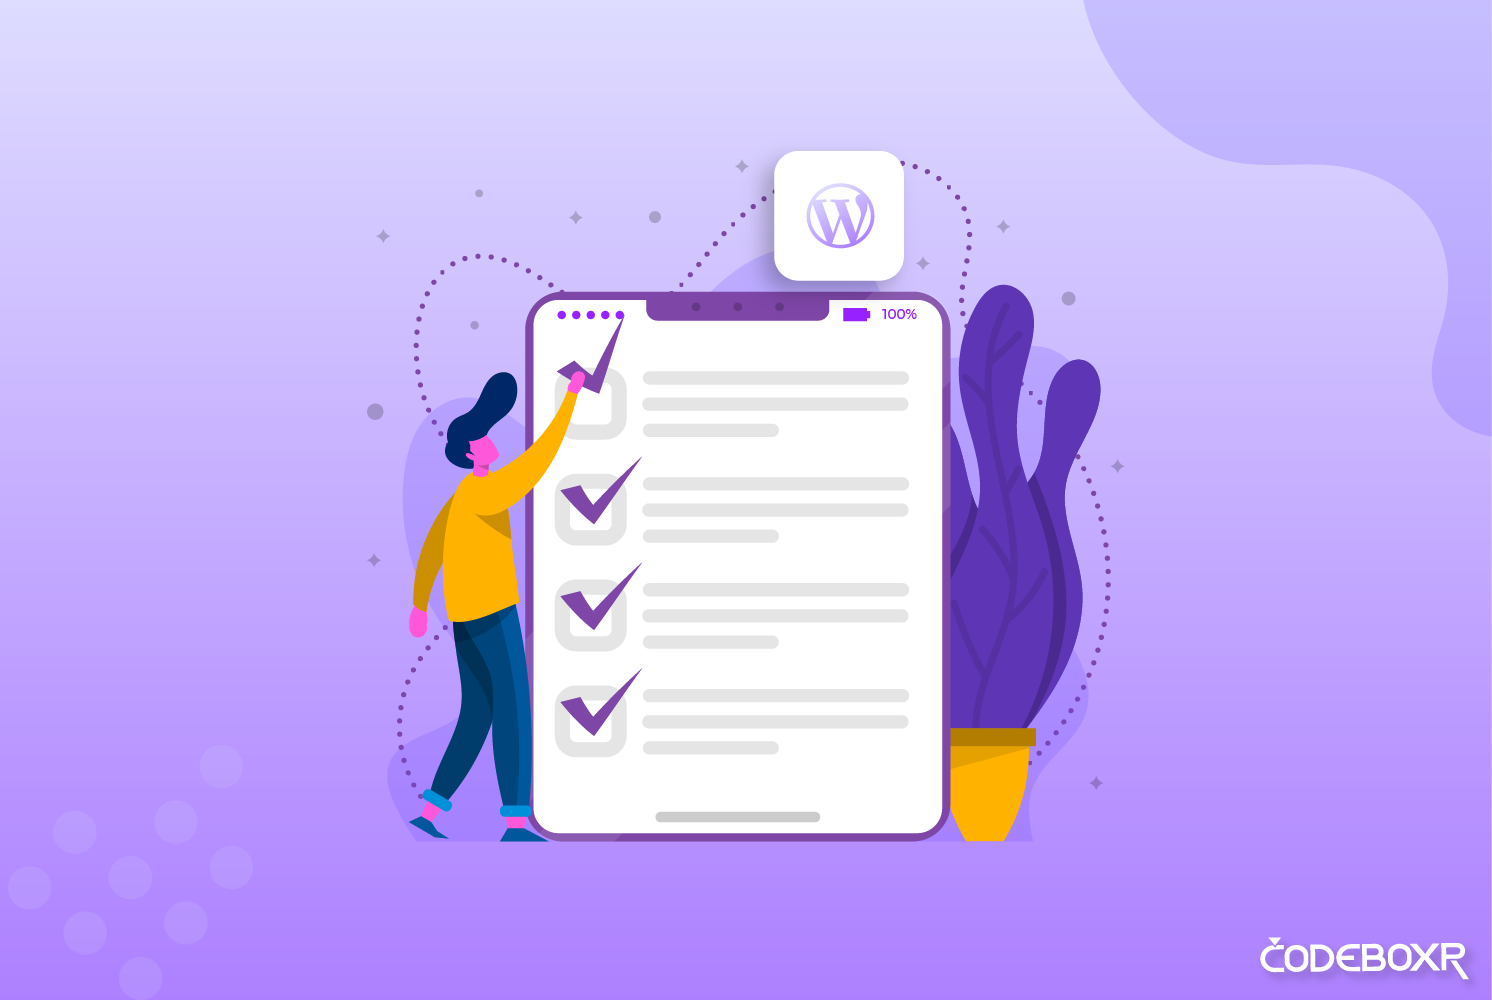
How to create Tour/User Walkthrough for WordPress
People often ask how to create a user tour for a website — the answer is pretty simple. If you’re using the right tools, you don’t even need to code! For WordPress cms based website with plugin like CBX Tour for WordPress, you can create interactive user Walkthroughs/Guided Tours for product, service, or any feature demonstration in the most easiest way. Using CBX Tour, creating a tour is like creating a post or article.
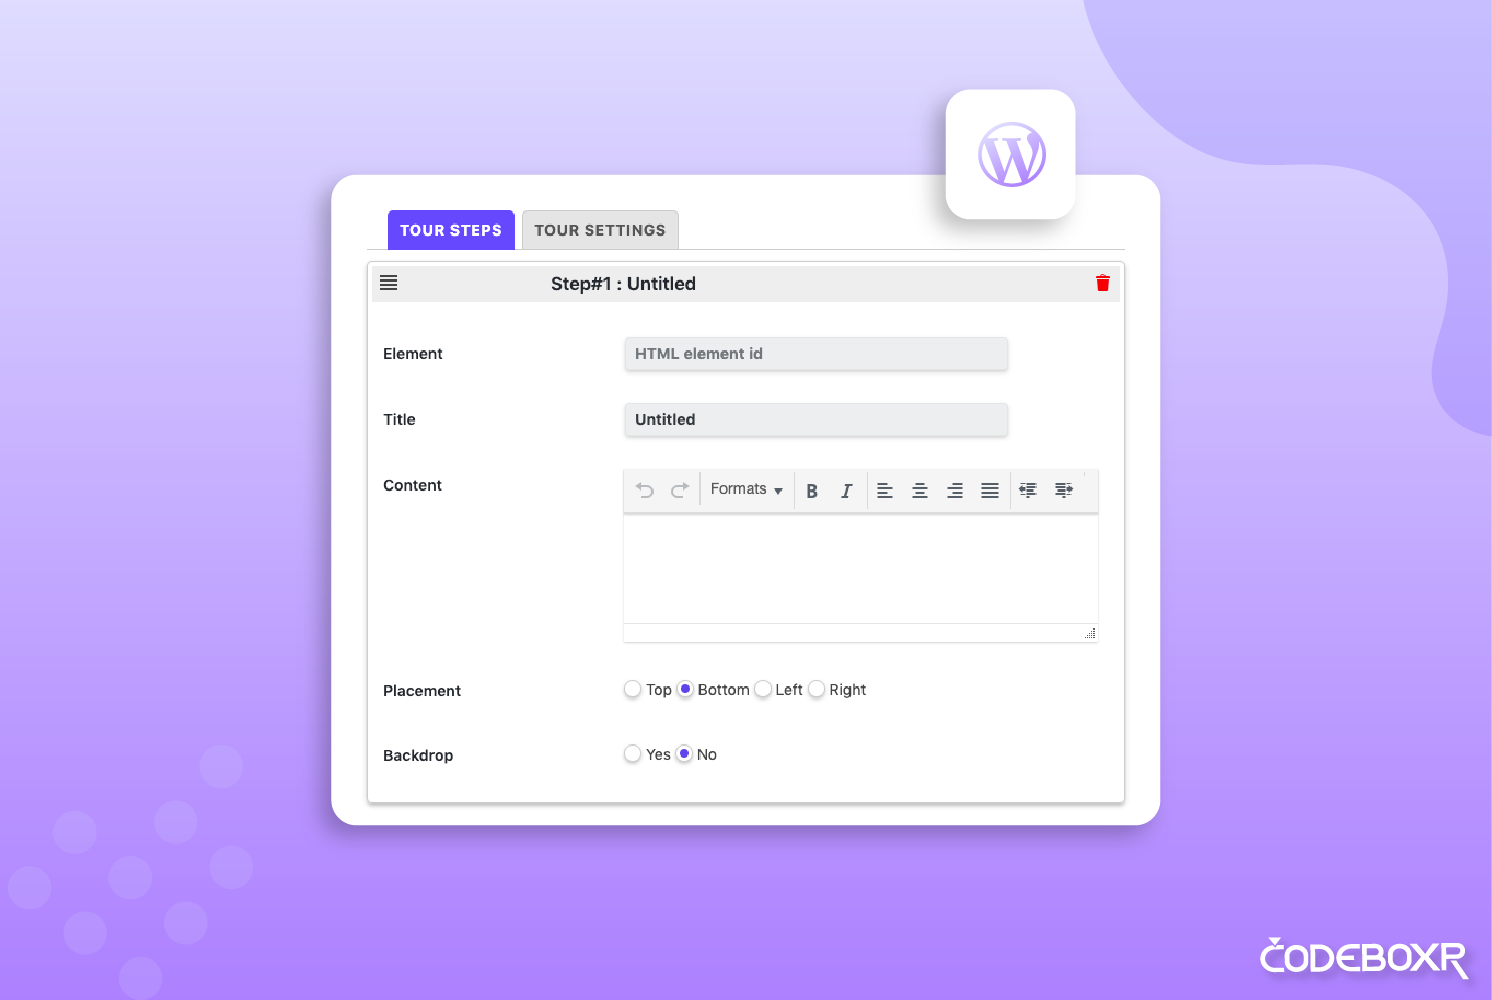
Every tour has individual settings and helps to configure as need. Like, hide and show tour button, custom text input available for tour button, a block button, tour Button alignment, auto start tour, tour layout/style chooser,
and Step Title.
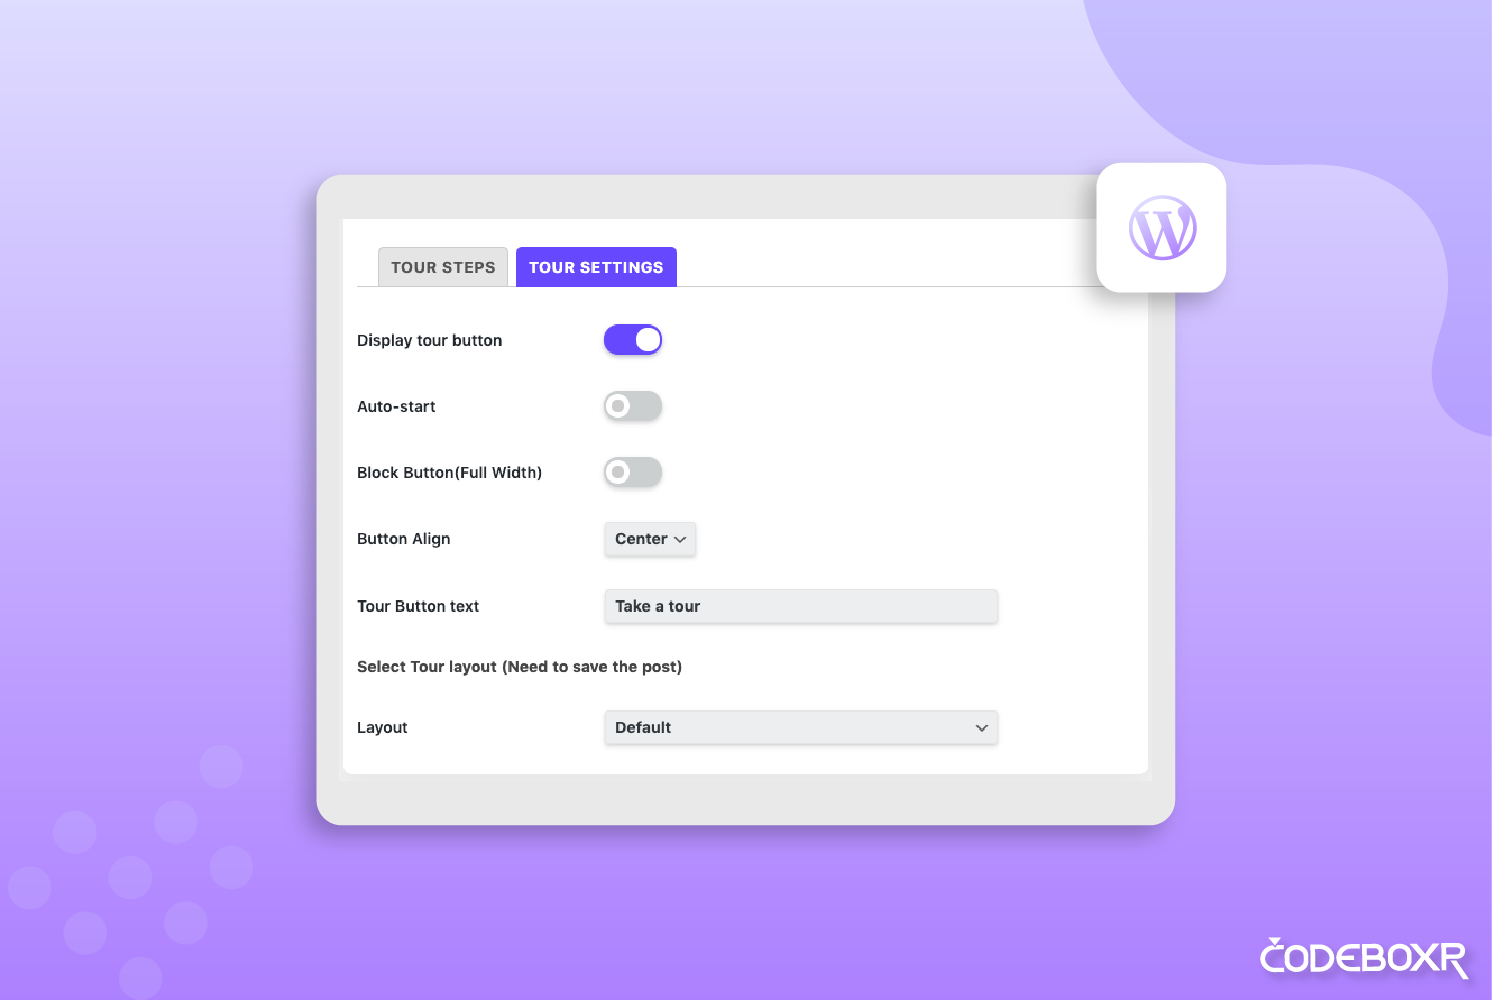
CBX Tour also has custom style. You can easily style your tour as you like. You can change the tour button font size, button padding, and change the color of the button and pop-up hover. CBX tour plugin has classic widgets and shortcode supports. Also, the most popular page builder plugin like Elementor, WPBakery, and Gutenburg. It Supports translation and localization following 100% WordPress native way for translation and i18 localization.
CBX Tour’s main core plugin is free and will always be free. You can find it here.
There is a pro addon with some extended features. With Pro addon, you can create an unlimited tour, custom style for button and pop-up hover, 10+ ready-made layouts and reset custom styles to default.


